James and I installed the rain barrel that we got at the beginning of the summer. I am actually hoping that it rains now!

James and I installed the rain barrel that we got at the beginning of the summer. I am actually hoping that it rains now!
What did you guys do this summer? James and I spent every weekend that we weren’t Autocrossing moving buckets of rock around the yard. Sounds fun, right? Wrong. I do not recommend picking this up as a hobby.
Anyway, it all paid off because now I have a yard full of grass instead of a jungle of weeds! Here are some progress pictures of the backyard:
Before:

Our first step was clearing out the weeds. We actually did this twice, because we love it so much. We did it in the spring, then didn’t get around to tilling and whatnot so it all grew back. Then we got to do it again in the fall.

Here it is with the pile of rocks. I utilized Craigslist and got rid of a lot of the rocks. The rocks are from the front yard, more on that later.

Dad took the rest of the rocks to fill holes in his driveway. We both win! Then he came over with his tiller and his trusty helper and we made some real progress.

Charlie is inspecting Dad’s tilling job.
Once it was all tilled, I raked it to get all the weeds out and even everything out. Then I got all my grass planting supplies together. I got a seed spreader on Craigslist for $10, which I was pretty excited about. I got the Scotts Contractor Mix grass seed, since it was cheaper than everything else AND it came with a free bag of Starter Fertilizer! I just love a good deal! My co-worker gave me some straw and I got to work.

That seed spreader is great, it made the whole process go so much faster.

Another great deal that I got was a $10 timer that came with a free sprinkler! The timer is great, I could just set it for 30 minutes and it turned off automatically. After watering about 17 times a day, I started to see progress…

Thankfully, Annabel was keeping an eye on things.
I don’t have a picture of the grass right now, but we’ve mowed twice and it’s really starting to look like a real yard!
I will have to get the pictures of the front yard together some other day. I switched phones halfway through the summer and don’t have all the pictures from my old phone on my computer. Now you have something to look forward to!
Charlie, my parents’ dog, is coming to stay with us for the weekend. Part of Charlie-proofing the house involved finally installing the cat door that I bought three years ago.
I initially bought it so i could keep the basement door closed to help keep the heat/air conditioning upstairs, but I just never got around to completing the installation.
I started installing it when I got it, but a circular saw was not the way to go. Yesterday I bought a reciprocating saw and that worked much better.
I let James have the honor of sawing, then had to install the door really quickly before it got dark out, so I only have a picture of the finished product.

So far, Annabel has only gone through the door once. When I was on the other side holding the flap open for her. Her food is now in the basement (another part of the Charlie-proofing project), so she may never come back through the door.
***UPDATE***
With some incentive (her food bowl) on the opposite side of the door, Annabel set her mind to it and finally went through the cat door by herself tonight.
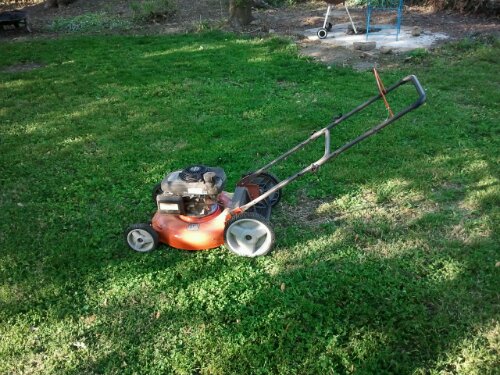
My old mower bit the dust last fall. James tried everything and it just didn’t want to work. After borrowing our neighbors’ mower for the first mow of the season, we broke down and bought a new one. James is quite the internet researcher and decided that the Husqvarna 7021P was the mower for us. I decided it was pretty enough for us and, after going to every home improvement store in Champaign, ordered it on Amazon. So far, so good. But I’ve only used it once.
Sometime in the fall (it might have been summer) the closer came off of my front door. Somehow the holes that the screws were in got stripped. I’m not sure how, since I never did anything with them. Anyway, I spent the winter hoping that the door wouldn’t blow into the side of the house and break when we forgot to latch it, then spent ten minutes installing a new closer.
First, I got to pick out my new closer. They had them in black, white, and silver, and the prices ranged from about $10 to $20 or so. I’m assuming that the more expensive ones are for heavier doors, but since mine is just an aluminum door, I got the cheapest one. I’m sorry, least expensive. James hates when I say cheap.
It came with instructions, which were pretty easy to follow.
I had to put the bracket on the door frame.

I didn’t pre-drill the holes, I just drilled straight into the wood. Then I had to figure out which screws went where. The shorter pin holds the closer onto the bracket, then the longer one holds it onto the thing that holds it onto the door. Then the two small screws hold that bracket to the door.

I did pre-drill the holes in the door, since the door is made of metal and is harder to screw straight into. The instructions recommended a 1/4″ bit.

And now the door closes whenever I open it! You can kind of see the little screw on the end of the closer that changes the tension of it. If it’s closing too slowly or too quickly, you can tighten or loosen the screw. I spent a lot of time opening and closing the door to find the right tension.

…found some baby bunnies living in a tree stump!
So my room mate and I were sitting on the couch the other day catching up on the housewives when she asked me if I knew how to fix a light switch. I remembered making circuits for my 4-H Electricity projects, but was pretty sure I needed something a bit fancier than those involving a 6-volt battery. Turns out the kind of fancy I needed cost 54 cents (59 cents with tax!).
I was going to change it last night, but then realized that after I turn off all the electricity to the house, I would have to use a flashlight to do the actual work. So, I waited until this afternoon.
I turned off all the power to the house, since my circuits aren’t labelled and even though Dad, Pat, and I spent hours one day trying to figure out which switches went where, we didn’t figure out all of them. Just to be safe, I turned off the main power. Then I opened all the curtains and got to work.

First, I took off the switch plate.

Then I unscrewed the switch from the wall.

Looks like this room used to be a lovely blue color! Once I got the switch out of the wall, I unscrewed the screws that were holding the wires to the switch and got wires off the switch.

Look at that lovely wiring! Now, it’s time for the new switch. Just screw the wires onto the new switch.

The old switch had one wire on each side, but there was a lower one and a higher one. Since the new one had both screws on the same side, I just put the lower wire on the bottom and the higher one on the top.
Then I just screwed the switch into the wall. The switch came with the screws held on by little plastic pieces, which I removed before screwing it in.

Then I just put the switch plate back on and now I’ve got a brand new working light switch!

And now my room mate doesn’t have to navigate her room by flashlight! Don’t think I’m a bad person, I gave her a lamp as soon as I found out the only light she had was a flashlight.
Next project:

Tackling the yard. Stay tuned!

…my hydrangea is pink!
Even though I have that super awesome new air-conditioner, with summer well on its way I decided to put some curtains up to keep that hot, hot sunlight out of my living room. And so my dreams of becoming a cave dweller are one step closer to becoming a reality.
The window* in my living room is on the south side of the house. While it is pretty shaded, some of the sun still sneaks through the leaves and causes a terrible glare problem on my tv. And even though Annabel enjoys the warm spots on the couch, I do not.
This brings me to today’s project. I had some brown curtains left over from my last apartment, where we had a window about the same size as the window* in my house. I’m going to see how many different shades of brown I can use in my living room.
After I bought the curtain rod at Target, I got it home and started freaking out that it might be the wrong size. I knew how big my window is**, but for some reason I was second guessing myself and tearing the house apart because of course, when I need it, I can’t find my tape measure. Luckily, just as I was tear up the living room closet, James showed up and was kind enough to lie on the couch and use himself as a measuring tool. He assured me that the curtain rod was the correct length.
So I got out my drill to make holes for the plastic anchors that came with the curtain rod. First I had to guess what size drill bit to use, since there were no clues about it on the package. Then I had to let the drill battery charge since I haven’t used it for awhile. Then I had to try a couple other drill bits. I finally found that the one I needed was the 1/4″ one. If you buy a REstyle curtain rod from Target, that is the size you should use, even though they want it to be a mystery.
So finally, after watching Wheel of Fortune, playing Angry Birds, dodging hail to put my car in the garage, hanging out in the basement during the tornado and installing the curtain rod, here is the end result:


I think it’s time for a drink.
*James insists that this is not a real window, since it is just a pane of glass set into the wall. He says a real window opens, and this one should just be called a glass wall since it is stationary.
**I hate this window and the fact that it doesn’t open. I spent a week or so pricing new windows last spring, but in the end decided to just hope that a branch flies through it or something so the insurance will replace it.


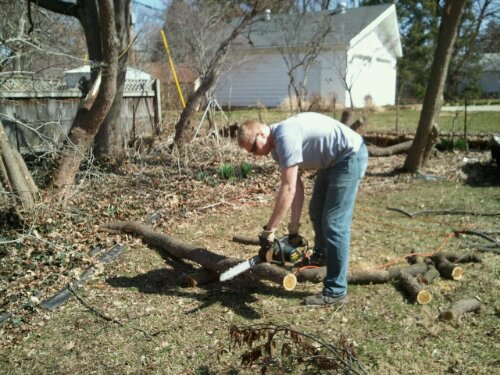
It’s that time of year again!
The chain saw has been fired up. I hope it’s in it for the long haul. It has a lot of work to do this year. I need to stock up on wood for the fire pit.

Recent Comments